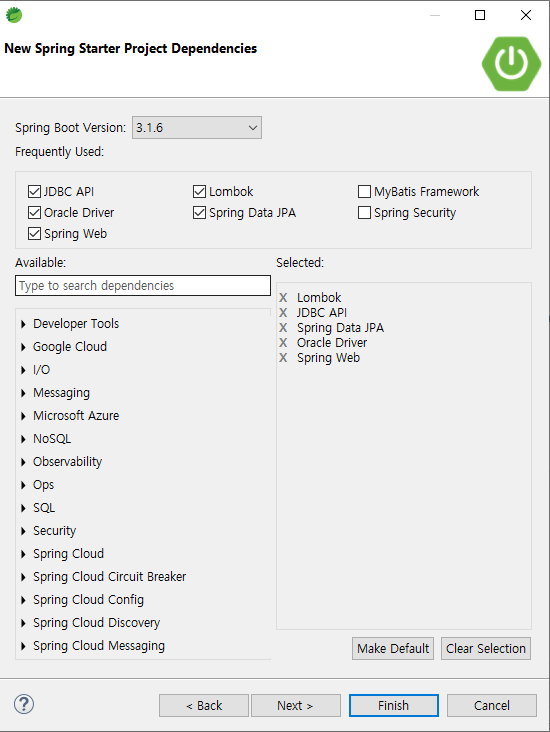
1. 프로젝트 생성 및 설정
* application.properties
server.port=8081

# oracle set
spring.datasource.driver-class-name=oracle.jdbc.OracleDriver
spring.datasource.url=jdbc:oracle:thin:@localhost:1521/xe
spring.datasource.username=(연결할 DB id)
spring.datasource.password=(연결할 DB pw)
spring.datasource.hikari.maximum-pool-size=5

spring.jpa.database-platform=org.hibernate.dialect.OracleDialect
# spring.jpa.open-in-view=false
spring.jpa.properties.hibernate.show_sql=true
# spring.jpa.properties.hibernate.format_sql=true
# none, create, create-drop, update, validate
spring.jpa.properties.hibernate.hbm2ddl.auto=create // 1회 생성 후 none 변경
2. 코드 작성
1) Entity
FileData
@Entity
@Getter
@NoArgsConstructor
public class FileData {
	@Id
	@GeneratedValue(strategy = GenerationType.SEQUENCE, generator = "fileData_seq")
	@SequenceGenerator(name = "fileData_seq", sequenceName = "fileData_SEQ", allocationSize = 1)
	private Long id;

	private String name;
	private String type;
	private String filePath;

	@Builder
	public FileData(String name, String type, String filePath) {
		super();
		this.name = name;
		this.type = type;
		this.filePath = filePath;
	}
}
2) Repository
FileDataRepository
@Repository
public interface FileDataRepository extends JpaRepository<FileData, Long> {
	Optional<FileData> findByName(String FileName);
}
3) Service
FileDataService
@Service
@RequiredArgsConstructor
public class FileDataService {
	private final String FOLDER_PATH = "c:\\images\\";
	private final FileDataRepository fileDataRepository;

	public String uploadImageSystem(MultipartFile file) throws IOException {
		String filePath = FOLDER_PATH + file.getOriginalFilename();
		FileData fileData = fileDataRepository.save(
				FileData.builder()
				.name(file.getOriginalFilename())
				.type(file.getContentType())
				.filePath(filePath)
				.build()
				);
		file.transferTo(new File(filePath));
		if(filePath != null) {
			return "파일업로드 성공" + filePath;
		}
		return null;
	}

	public byte[] downloadImageSystem(Long id) throws IOException {
		FileData fileData = fileDataRepository.findById(id).orElseThrow(RuntimeException::new);
		String filePath = fileData.getFilePath();
		return Files.readAllBytes(new File(filePath).toPath());
	}

	public List<FileData> findAll() {
		return fileDataRepository.findAll();
	}

}
4) Controller
FileDataApiController
@RestController
@RequiredArgsConstructor
public class FileDataApiController {
private final FileDataService fileDataService;
// image upload
@PostMapping("/file")
@CrossOrigin
public ResponseEntity<?> uploadImage(@RequestParam("image") MultipartFile file) throws IOException {
String uploadImage = fileDataService.uploadImageSystem(file);
return ResponseEntity.status(HttpStatus.OK).body(uploadImage);
}
// get image
@GetMapping("/file/{id}")
@CrossOrigin
public ResponseEntity<?> downImage(@PathVariable("id") Long id) throws IOException {
byte[] downloadImage = fileDataService.downloadImageSystem(id);
if(downloadImage != null) {
return ResponseEntity.status(HttpStatus.OK)
.contentType(MediaType.valueOf("image/png"))
.body(downloadImage);
} else {
return ResponseEntity.status(HttpStatus.NOT_FOUND).build();
}
}
// get image list
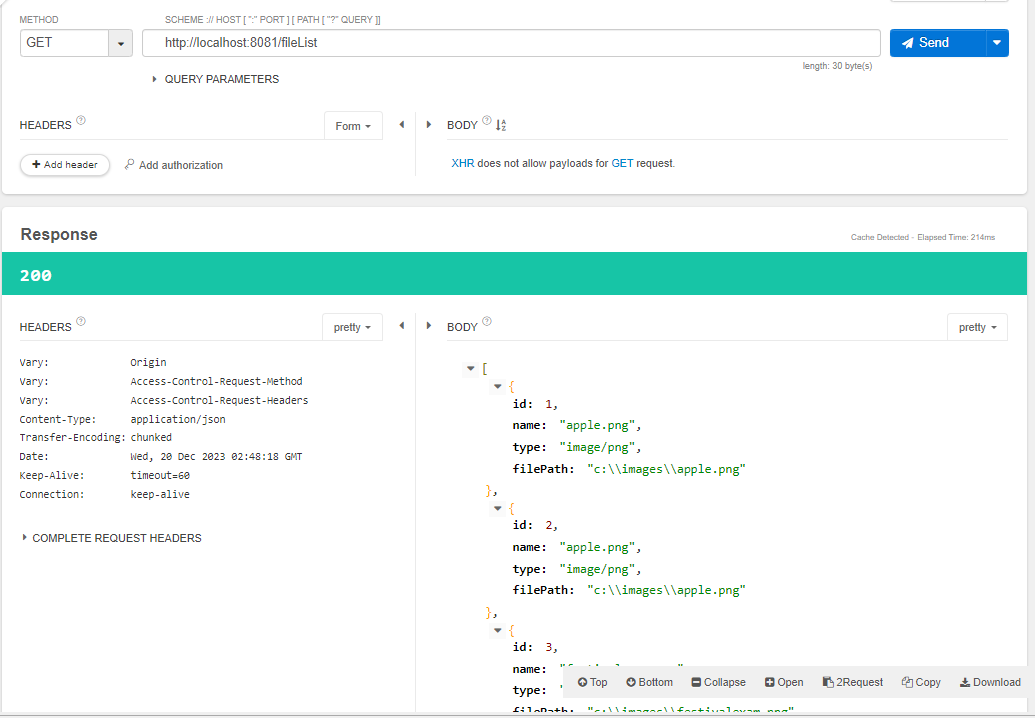
@GetMapping("/fileList")
@CrossOrigin
public ResponseEntity<List<FileData>> getFileList() {
List<FileData> fileDataList = fileDataService.findAll();
if(fileDataList != null) {
return ResponseEntity.status(HttpStatus.OK).body(fileDataList);
} else {
return ResponseEntity.status(HttpStatus.NO_CONTENT).build();
}
}
}
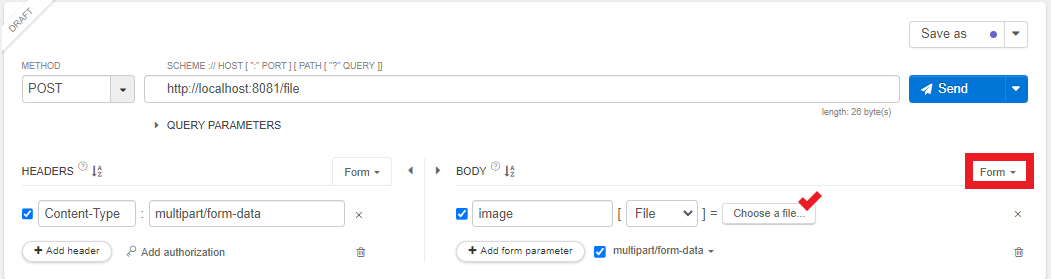
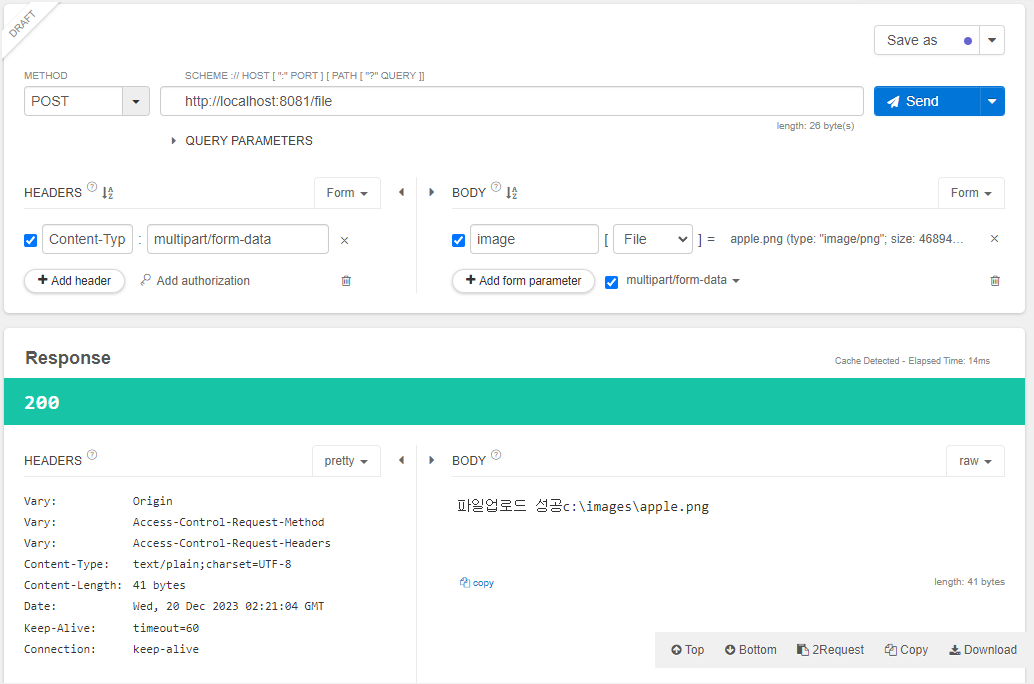
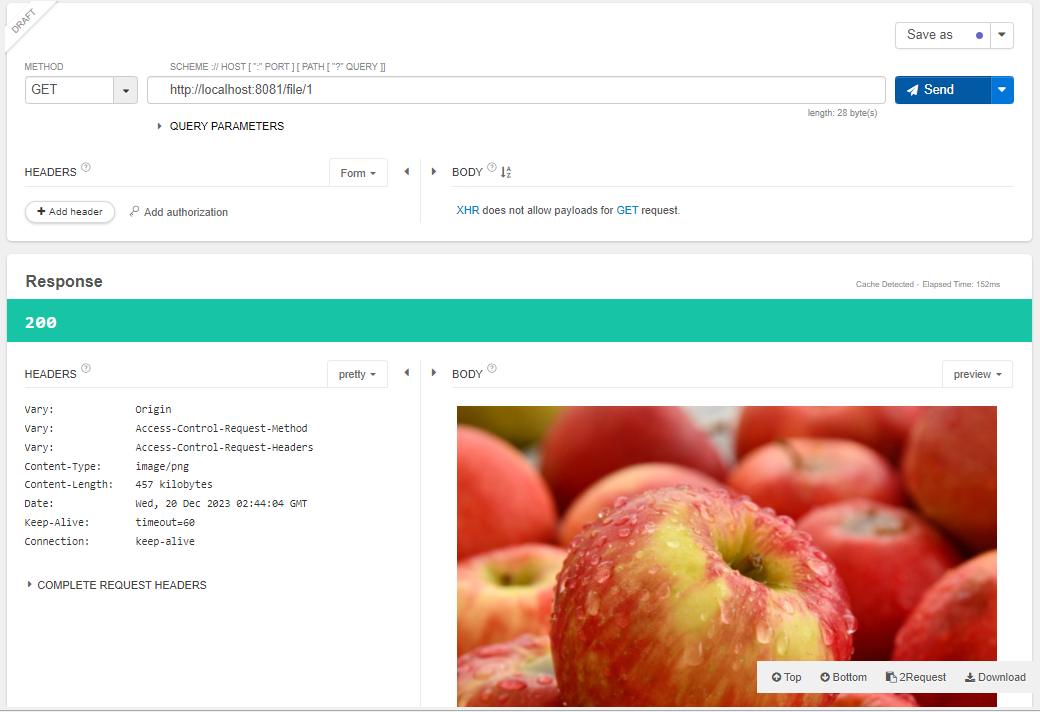
3. 구동 확인 💻
Talend API Tester에서 확인
1) file upload

2) get file
3) get file list
'Framework > SpringBoot' 카테고리의 다른 글
| [Spring Boot] File Upload 구현하기 ② - 복수 파일 업로드 적용 (1) | 2023.12.21 |
|---|---|
| [Spring Boot] CrudRepository, RestController (0) | 2023.11.30 |
| [Spring Boot] JPA로 게시판 구현하기 (0) | 2023.11.29 |
| [Spring Boot] JPA Repository (0) | 2023.11.28 |
| [Spring Boot] JPA로 CRUD 적용하기 (0) | 2023.11.27 |


